
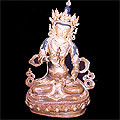

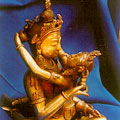
The Nepalese ritual and traditional icons of bronze and copper are famous the world over. The numerous art works in museums and personal collections reflect the superb skill and workmanship of the masters who produced them in the past. This great talent has been nurtured till today by not only the demand within Nepal for sacred and ritual icons but also by buyers from all over the world. These pieces are cast in the lost-wax or cire-perdue process. The technique involves the moulding of beeswax into the desired form, after which the wax is covered with a layer of fine clay and rice-chaff mixture. Meanwhile clay is also deftly tucked inside the image. Once the clay is heated, the wax melts out through a hole in the bottom to leave a hollow mould, hence the name ‘lost wax’. When molten bronze has been poured inside and has cooled, the mould is broken and the piece released for further refining. Each piece is therefore unique and individually cast.
PRACTITIONERS & LOCATIONS
The casting of metal objects using the lost wax method has been practised for centuries by craftsmen from the Newar community known as kasa. Within this classification, there are basically two castes that dominate: the shakyas or those who work with brass or bronze; and the tamrakars or those who work with copper or brass. The shakyas come from a relatively high caste and tend to be Buddhist. Unlike the shakyas, who focus more on metal cast objects, the tamrakars are well known for their work with brass and copper sheets that are beaten into shape using a special hammer.
Metal casting is a craft/ occupation that uses the skills of every member of the family, with each member being given a specific role and responsibility. Traditionally, the skilled tasks in the casting process were carried out by men, while the less skilled tasks were performed by women and children.

The production of metal crafts by this process of casting is centred chiefly at Lalitpur where it has been a household industry for centuries; the work is done by the kasa who are professional metal-workers. Metal casting is done, to some extent, by the kasas of the Kathmandu Valley specially those from Bhaktapur and outlying regions such as Tansen (Palpa district, west Nepal), Pokhara (west Nepal), and Bhojpur (east Nepal) – Tansen, Chainpur, and Bhojpur still remain centres for the production of brass and bronze household items, though the tradition is a languishing one. Ten years ago in Bhojpur, there were 40 families making cast objects using the lost wax method; today, this number has dropped to eight families. Similar changes have also occurred in Tansen and Chainpur.
RAW MATERIALS
In the casting process used for utilitarian vessels, pitchers, and bowls, two basic alloys are found (most often) – bronze (kasa), the more sought after combination of metals, consists of copper and tin in a ratio of 3:1, and brass (pittal), consists of copper and zinc in a proportion of 3:1.
Bronze products are more expensive to purchase as the cost of tin is much higher than the cost of zinc. Copper is relatively inexpensive to buy. In addition to price, there is also a significant difference in the appearance of these two metal combinations. Bronze, which is a harder alloy, has a silvery colour. It is considered by craftsmen to be easier to work with because of the speed at which it melts and cools. Brass, on the other hand, has a yellowish tint.
Utensils are also cast from discarded brass and bronze (khu) that has been combined, melted down, and recast. The colour of these objects varies depending upon the concentration of either brass or bronze and the quality of the metals used.
PROCESS & TECHNIQUE
The process followed has some similarities to that used in casting icons.
A general rule is that any items taller than 20 cm are made in two halves at the wax moulding stage; these separate pieces are later joined together after the casting step.
Beeswax (maina) – collected in the more remote hill and mountain districts – is repeatedly heated over hot coals and continuously kneaded until it is soft and pliable. While working the craftsman rubs oil into his hands to prevent the wax from sticking to his fingers. Once softened, the wax is roughly formed by hand. To acquire the appropriate shape, thickness, and smoothness, the wax shapes are refined using a horizontal, hand-powered rotating wheel (charkha). In the past, this device required two persons to operate it – one person to crank the wheel and the other to manipulate the wax piece. Now however, motorised versions are available, thus reducing the arduous nature of this step. This charkha is now often operated by the women folk. Using a thin layer of heated wax, the wax product is skilfully placed onto the wheel. Once centred, additional wax is melted to ensure that it is firmly attached.
With the charakha turning at a constant rate, sharpened, chisel-like tools (baaks) are used to create a smooth finish and to ensure that the wax model conforms to the proper thickness. The baaks are also used by the craftsmen to shape, refine, and provide details to the wax model. This might include a line or series of lines around the rim, mid-section, or base – depending on the design, an entire range of baaks might be required. Throughout this meticulous process, a small piece of furniture (kunsi) is used to steady the workman’s arm.
Once this initial step has been completed, the wax model is gently removed from the wheel, using a sharpened baak. A three-pronged, tripod shaped piece of the model. This attachment will act as the passageway for the molten metal during the casting stage.
There are three steps required to make the actual mould used for casting metal objects. To carry out these steps, four basic ingredients are needed: water, cow dung, ordinary rice husk, and a special type of clay that is yellow in colour, dry and quite brittle.
As part of the first step, each wax model is dipped into a thin solution made of 60 per cent clay and 40 per cent cow dung mixed with water. This liquid mixture (masy) has a very fine consistency and can easily pick up the features of the wax model. The process is carried out a total of three times. Between each application, the coated models are allowed to dry thoroughly, avoiding direct sunlight to ensure that the wax does not melt prematurely. Depending on the weather, it can take up to two days to dry each layer. If the models are not dried properly, they can break once the molten metal has been applied.

As part of the second step, a combination of 40 per cent rice husk and 60 per cent clay is added to water to melt the wax inside. A small hole is created at the top of the three-pronged nowcha to allow the liquid wax to be poured out. Although approximately half of the wax is recovered, the rest is absorbed into the walls of the mould itself. This is where the phrase ‘lost wax method’ is derived from. The mould is then heated to a red-hot state again and set aside for the next step.
Since beeswax is expensive to buy, after it is retrieved from these moulds it is refined to remove impurities and used again. The hole where the wax was retrieved will later be used as the passage for pouring the molten metal into the mould itself.
As part of this stage, the actual casting of the mould is performed. A melting bowl or crucible is created for each mould from a mixture of 75 per cent clay and 25 percent smooth husk. This bowl is made large enough to hold the required quantity of metal to cast each object. The amount of raw metal needed is calculated by multiplying the weight of the initial wax model into nine. Once determined, the metal is placed into the melting bowl that is then physically attached to the moulds using a mixture of 60 per cent clay and 40 per cent husk. The bowl is placed in such a way that it covers the hole produced at the nowcha.
Once this step has been completed, the entire mould/melting bowl combination is placed into a heated casting oven (kwajhya) with the melting vessel facing downwards. Bronze requires two hours to melt while brass requires an additional hour. Using a long, pointed pair of tongs (sanyasu), the red-hot models are removed from the charcoal, shaken, and then tipped over to allow the molten metal to drain inside through the nowcha. The mould and the molten metal must be at the same temperature for this step to be successful – otherwise the metal will not flow properly.
After allowing the moulds to cool for 30 minutes, the metal object is removed by chipping the layers of mud/rice husk away. It is then washed in water. At this point, the metal is very soft and has a rough, grey, and oily appearance. By heating the object until it is red-hot and then plunging it into a pail of cold water the metal is instantly rendered hard.
As part of the final stage, the inside and outside of each metal piece is filed using a tool called retti. This process removes any defects or deformities and brings out the true colour of the metal. It also allows the craftsman to create a smooth, flat surface for areas that will later be joined and removes any excess material resulting from the casting process, especially near the points where the molten metal entered the mould.
In the case of a utensil that needs to have additional pieces joined together, this is done using thin layers of a special metal combination that is melted to hold the different segments together. For bronze, a 50 per cent tin and 50 per cent lead mixture is often used; and for brass, a 75 per cent brass and 25 per cent zinc mixture is used. As part of this step, a small quantity of the joining metal is placed between the pieces that are to be combined. Tree sap is sometimes used to hold the items in place.
The joints are then covered with hot coals until this metal mixture has melted completely. After removing the coals, if any molten material has come out of either side of the seam, it is smeared with a small sap covered stick. Likewise, if there is not enough metal in the seam, a thin rod made from the joining material is used to fill in the gap. Pressing the rod up against the hot object, a soldering technique is used to add more metal. While still hot, cold water is poured on to the object to harden the metal.
After cooling, the assembled vessel is filed and polished several more times. Using a thin layer of wax, the object is attached to the charkha wheel. A variety of different baaks are used to further file the inside and outside surfaces of the vessels. In some cases, a combination of water and brick dust (sikhachu) is used to polish the item. A mixture of water and wood ash (karani) is used to carry out the final polish. This combination, which is less abrasive, provides a nice bright shine. Following these steps, the object is finished and ready for sale.
DESIGNS
Using the lost wax method, objects such as batukas, ankhoras, and karuwas can be made with elaborate designs along the outside. For example, many akhoras have a series of oval-shaped medallion patterns, depicting images of Lord Krishna, Krishna and Radha, flowers, peacocks, or Lord Buddha. Others might contain a composite abstract pattern that completely covers the outside of the object. In addition to these motifs, there might also be a set of continuous rings in the form of flower vines that encircle the container.
To create a given design, an additional step is required during the formation of the wax models. Small printing blocks made out of a smooth, flat, textured stone are required for this step. These blocks are prepared using a sharpened, iron pencil to etch a particular design on to the stone itself. In some cases, several different etchings are made on a single piece. Since the quality of the stone used determines the texture of the print created, care is exercised when selecting the stone. Once prepared, these etched stones can be used for many years.
To use the print blocks, a small quantity of wax is heated until it is soft and then smeared over the etching on the stone, often using one’s fingers. To prevent the wax from sticking to the stone print, either vegetable oil or just plain saliva is used. It is not uncommon for the workman to lick the block directly in an effort to save time. The thin layer of wax, which contains the impression etched onto the stone, is then peeled off. A pair of scissors or a small blade is used a trim the print into the desired shape. Depending on the number of objects being created, hundreds of these wax patterns might be prepared by the craftsman in a given session.
The etchings are heated and then placed on to the wax model. Care is needed to ensure that the individual peelings are well positioned. For example, the circumstances of a given container must be measured to ensure even spacing of the patterns. The goal is to place each of the oval medallion pieces onto the object with equal distance between each one. It is not uncommon to find objects for which the spacing of these designs was miscalculated. For example, some peacock batukas and ankhoras have one of the medallions cut in half to fill in a remaining space. Between each oval pattern, there are often thin decorative strips used fill in the spaces. These are made using the same process. To create the continuous flower rings around an object, small rectangular or square wax patterns are placed next to each other to act as the building blocks for this design. Once attached, the wax models go through the series of steps described above.
Access 70,000+ practitioners in 2500+ crafts across India.

10,000+ listings on arts, crafts, design, heritage, culture etc.

Rich and often unfamiliar vocabulary of crafts and textiles.

Needs to be written.